Set up your client portal
Use this guide when you are setting up the client portal for the first time.
What the client portal is
The client portal gives your clients their own Barkway space where they can:
- View bookings
- Send booking requests
- Manage pet details
- View invoices and documents
- Update account profile details
What clients can do depends on your portal and service settings.
Before you start
Before you share your portal with real clients, check these first:
- Portal is enabled in Settings → Portal
- Business details and branding are set up
- Client email addresses are saved correctly on client records
- Services you want clients to request are marked Available for client booking requests
- Opening hours and groomer availability are configured if booking requests are enabled
- You have a test client ready so you can test the full flow yourself first
Step 1: Enable the client portal
- Go to Settings.
- Open the Portal section.
- Turn on Enable client portal globally.
- Save your changes.
For full portal controls, see Enabling client portal.
Step 2: Check your business details and branding
Your portal experience uses your business and branding settings.
Check:
- Business name
- Logo
- Contact details
- Branding colours and theme choices
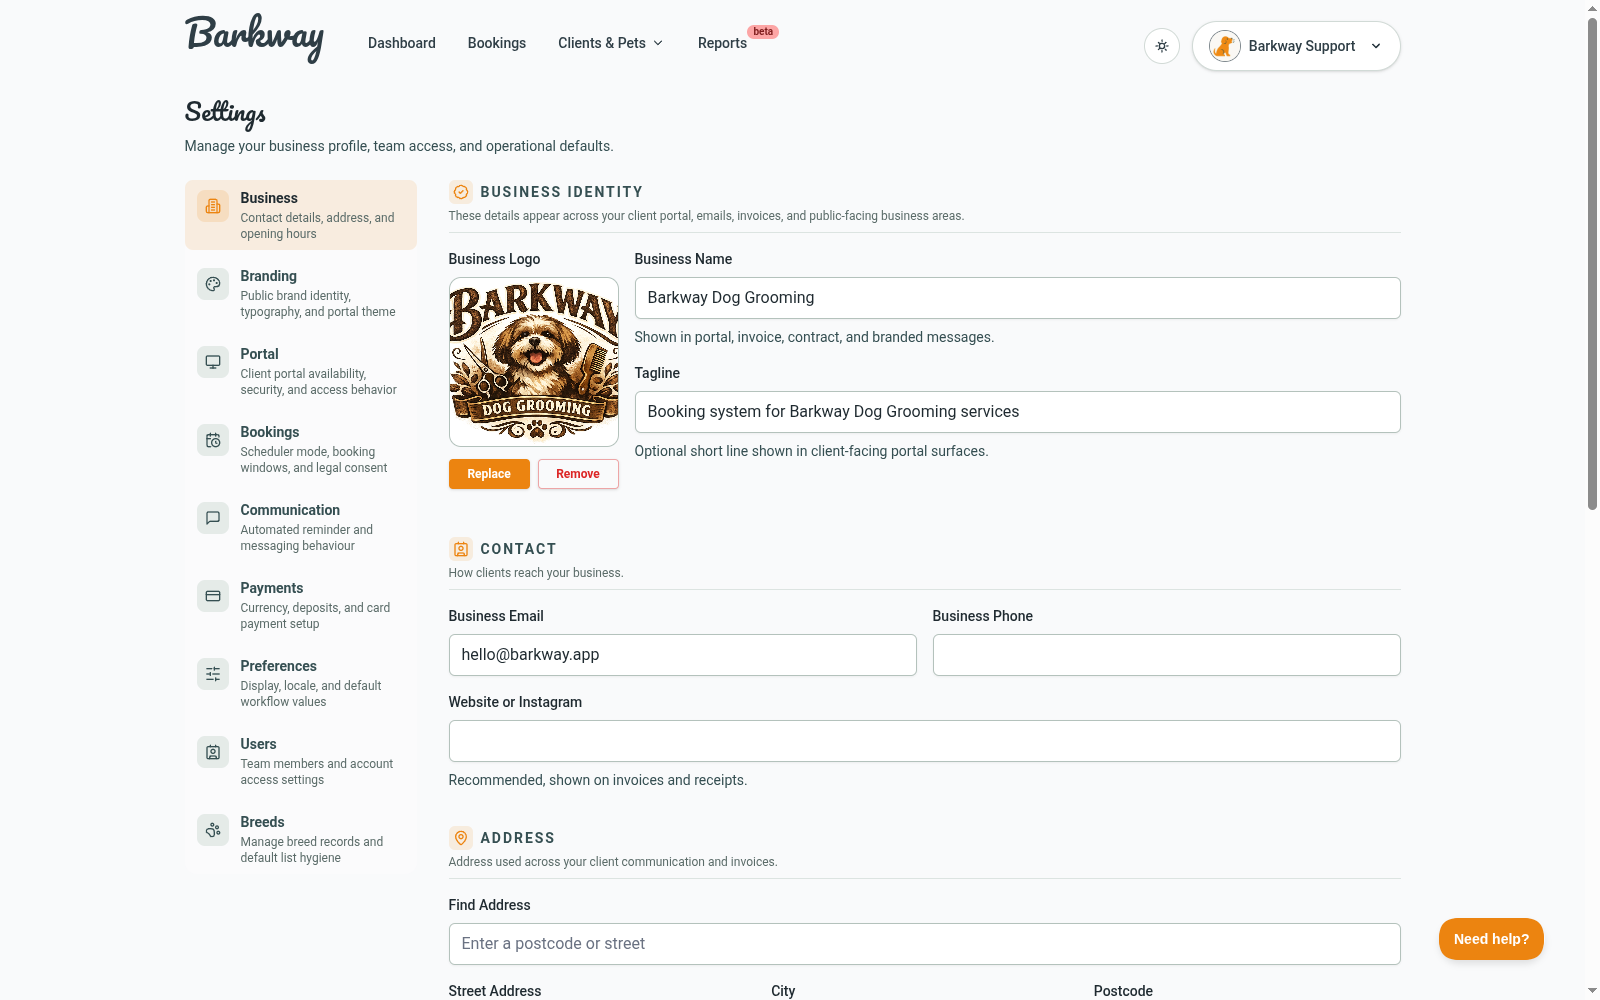

For more detail, see Settings.
Use your Background colour as a light or dark off-tone, not your main brand accent.
Your Primary and Highlight colours should carry the stronger brand colour.
Step 3: Choose which services clients can request
Enabling the portal alone is not enough. You also need to choose which services appear in client booking requests.
- Go to Services.
- Open a service to edit it.
- In Client Booking Requests, turn on Available for client booking requests.
- Confirm your service setup matches how clients should book:
- Clients must select exactly one core service
- Clients can then add optional add-ons
- Save your changes.
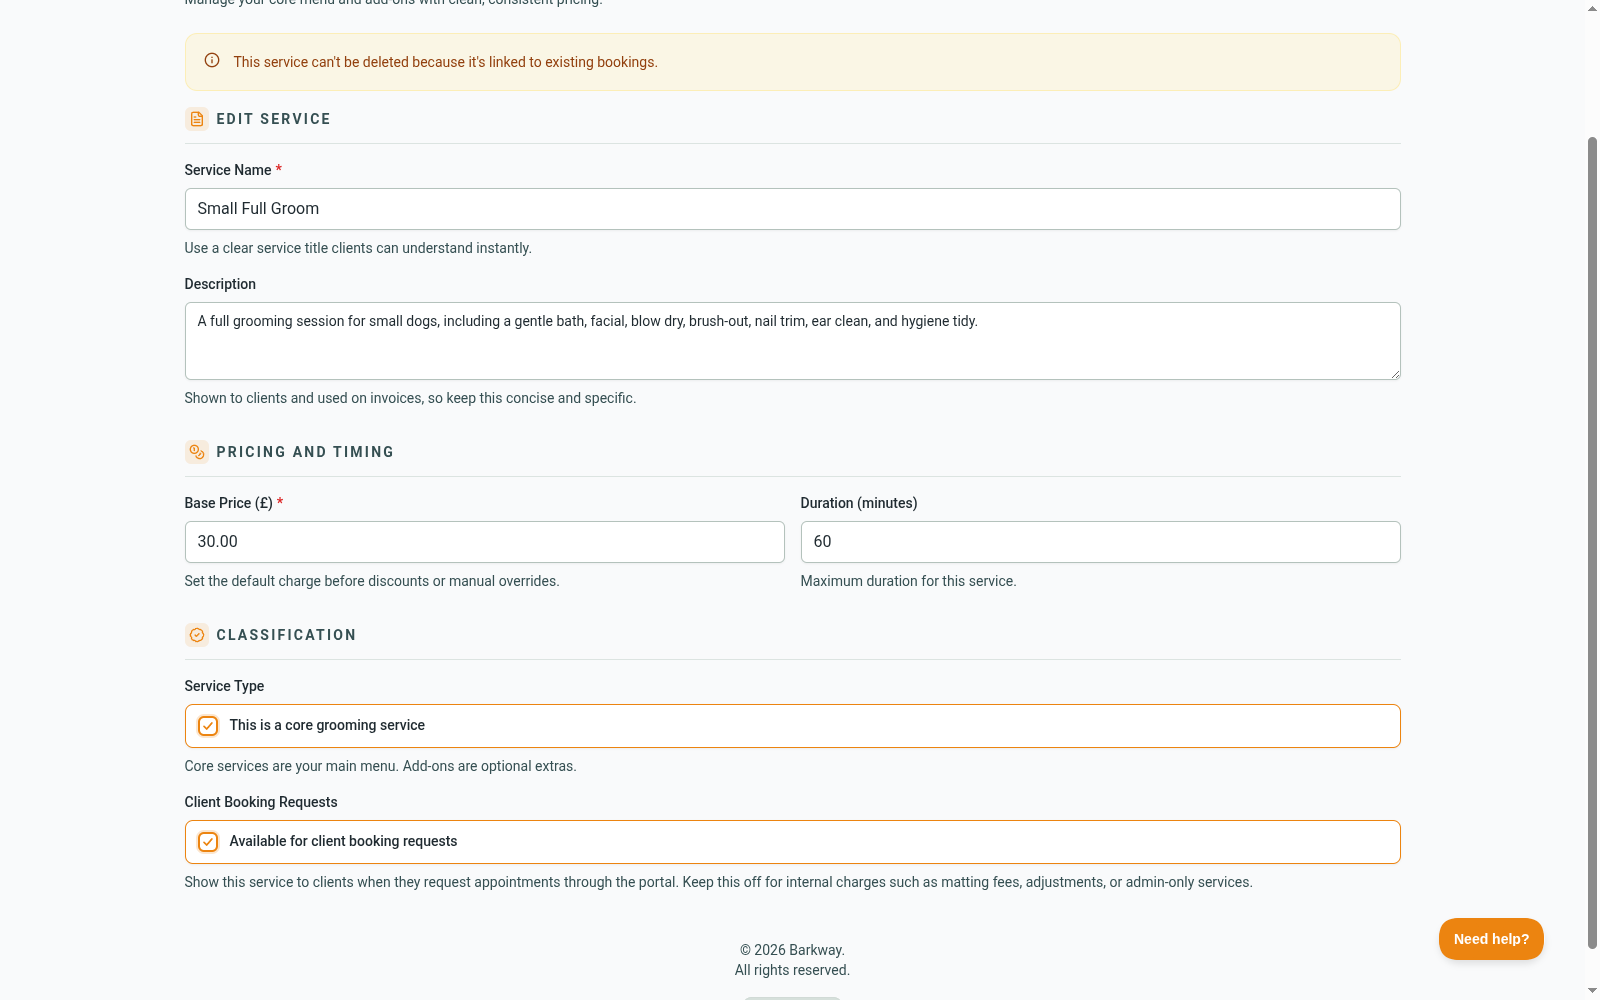

Important for standalone extras
If you want clients to request standalone extras such as nail clips or teeth cleaning, do not rely only on add-ons.
Portal booking requests require exactly one core service. So if an extra needs to be bookable on its own, set up a suitable core option (for example an Other core service), then keep extras as add-ons where needed.
See Core vs add-ons and Client-bookable services.
Step 4: Understand how client booking requests work
Client booking requests are requests, not confirmed bookings.
Your client chooses services and a preferred slot, then submits a request. Your team still reviews it in Barkway and accepts or rejects it.
- Accepted requests become bookings
- Rejected requests do not create a booking
See Portal booking requests and Booking requests (staff workflow).
Step 5: Share your portal link with clients
Your client portal URL is your Barkway workspace URL plus /portal/.
Example:
- Workspace:
https://yourbusiness.barkway.app - Client portal:
https://yourbusiness.barkway.app/portal/
You can send clients a message like:
Hi, you can access our Barkway client portal here:
https://yourbusiness.barkway.app/portal/. Use the email address we have on file for you and Barkway will send you a secure sign-in link.
For login details, see Passwordless login (magic links).
Do clients automatically get an email?
No. Saving a client email address does not automatically send a portal invite.
The email address is used so Barkway can match the client when they request login from the portal. A sign-in email is sent when the client submits their email on the portal login screen.
Test the portal before sharing it
Before you share with real clients:
- Create a test client using an email address you can access.
- Add a test pet.
- Enable at least one service for client booking requests.
- Open your portal URL in a private/incognito window.
- Request a sign-in link using the test client email.
- Check portal branding and visible data (bookings, invoices, documents, pets).
- If booking requests are enabled, submit a test request.
- In staff view, confirm the request appears in Bookings → Requests.
- Clean up test data afterwards if needed.
Troubleshooting
Client cannot sign in
- Check the client email exactly matches what is saved on their client record
- Check for typos in the entered email
- Ask them to check spam/junk for the sign-in email
- Ask them to request a fresh link if the previous one expired
Client cannot see booking options
- Check Allow clients to request bookings is enabled in Settings → Portal
- Check services are marked Available for client booking requests
- Check your opening hours and groomer availability
Branding looks wrong
- Recheck business and branding settings in Settings
Form inputs are odd colours
- Check your branding colour setup in Settings
- Use Background as a light or dark off-tone rather than a bold primary colour
- Use Primary and Highlight as your main feature colours
Portal link does not work
- Check the subdomain is correct
- Check the link includes
/portal/ - Check the portal is enabled
Related guides
Need a hand?
Email the Barkway team and we’ll point you to the right place.